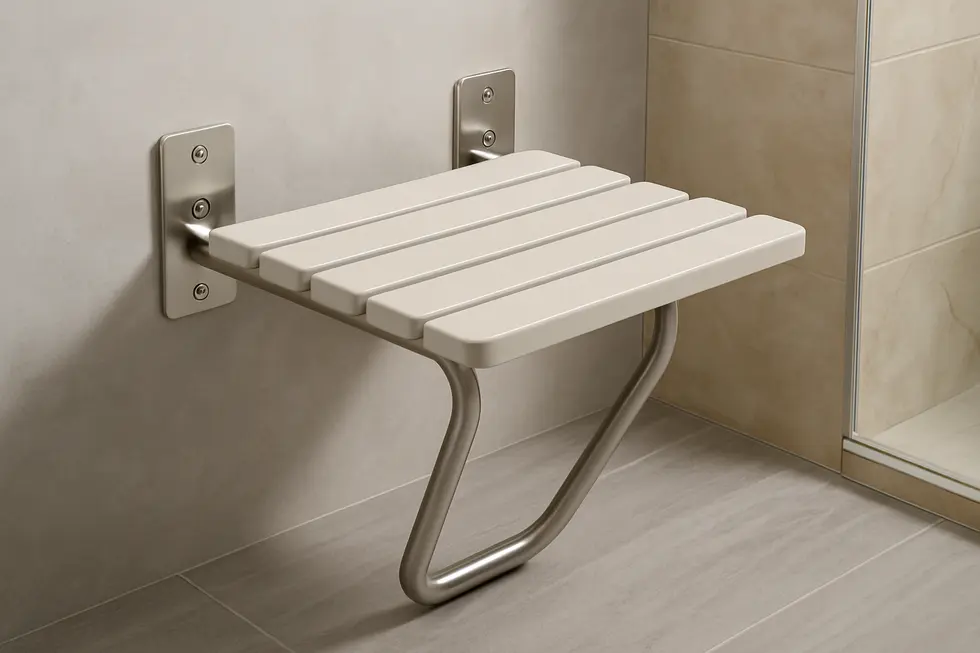
Shower Seat
Choosing the Best Screws for Your Wall Mounted Shower Seat
Jul
Finding the right screws for a wall-mounted shower seat is crucial for the safety and durability of the installation. With bathrooms being a moisture-heavy environment, selecting screws that will resist corrosion while providing sufficient strength is essential. This article explores the best materials for screws, proper installation techniques, and compliance standards to ensure your shower seat is securely mounted and safe to use. Each chapter will delve into these aspects, equipping you with the knowledge to make informed decisions for your home.
Why Stainless Steel Reigns Supreme: Material Choices That Keep Your Wall-Mounted Shower Seat Secure
Moisture is relentless. Steam seeps into every joint, hot water splashes across brackets, and cleaning chemicals linger after each rinse. In this unforgiving environment, the screw material you choose will decide whether your wall-mounted shower seat remains a reassuring perch or becomes a hidden hazard.
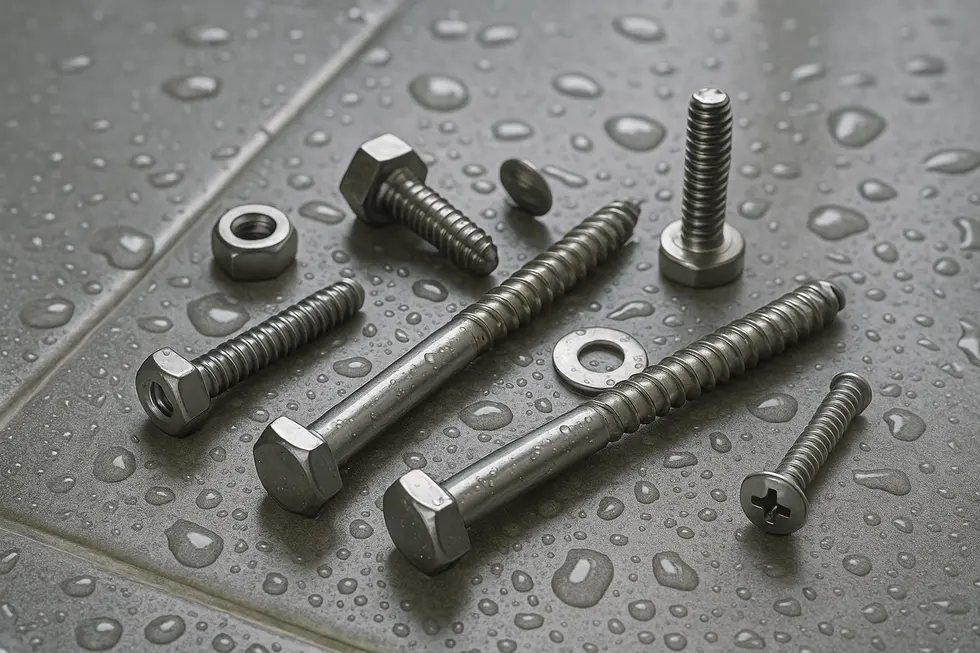
The gold standard is 304 stainless steel lag screws. Their chromium-rich alloy forms a self-healing oxide layer, stopping rust before it starts and preventing the ugly orange streaks that betray lesser fasteners. Because stainless steel retains tensile strength even after years of exposure, it maintains the clamping force that keeps the bracket tight against the wall. That constant pressure is what allows the seat to resist the downward pull of 250-plus pounds at a right angle.
Equally critical is avoiding galvanic corrosion. Many premium brackets are cast from anodized or ribbed aluminum. Pairing them with zinc-plated or dissimilar metal screws can spark an electrolytic reaction once water enters the joint, quietly eating away at both parts. Stainless steel’s electrochemical compatibility with aluminum eliminates that threat, so the fastener and bracket age at the same pace rather than at each other’s expense.
Size matters, too. A typical 1/4-inch diameter screw may suffice for lightweight shelving, but shower seats benefit from beefier 1/2-inch shafts driven at least 2-1/2 inches past tile and backer board into solid 2 × 4 blocking. The increased shank area spreads the load, while deep penetration anchors the threads in wood that will not crumble like drywall. For masonry walls, stainless lag shields or concrete anchors offer similar security.
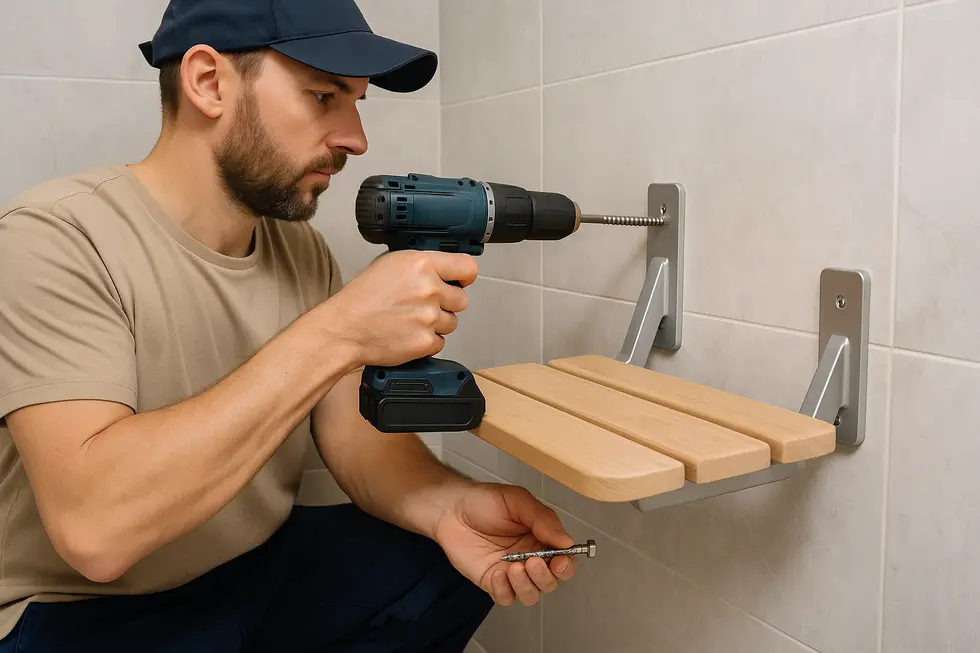
Some folding seats arrive with their own stainless hardware, yet DIY installers often misjudge placement. If the supplied screws miss a stud by even half an inch, capacity plummets. Before tightening anything, rehearse the layout with a stud finder, then drill pilot holes that guide each screw dead-center. For additional peace of mind, consult this practical step-by-step installation guide that highlights blocking techniques.
Choose the right metal, choose the right diameter, and hit solid framing every time. Do that, and your shower seat will remain as dependable on day three-thousand as it was on day one.
Anchor It Right: Safe Mounting and Screw Selection for Wall-Mounted Shower Seats
Choosing the correct fastener is the moment where a stylish wall-mounted shower seat either becomes a lifelong aid or a lurking hazard. Stainless steel lag screws—grade 304 or 316—provide the backbone. Their coarse threads excavate deep into lumber, hex heads accept high torque, and the chromium-nickel alloy shrugs off steam, soap, and occasional bleach. Opt for nothing slimmer than 1/4 in (6 mm); many professionals jump to 5/16 in or even 1/2 in when the seat will serve heavier users. Length is equally critical: after crossing tile, thin-set, backer board, and bracket, at least 50 mm (2 in) of screw must bite clean, dry 2 × 4 framing.
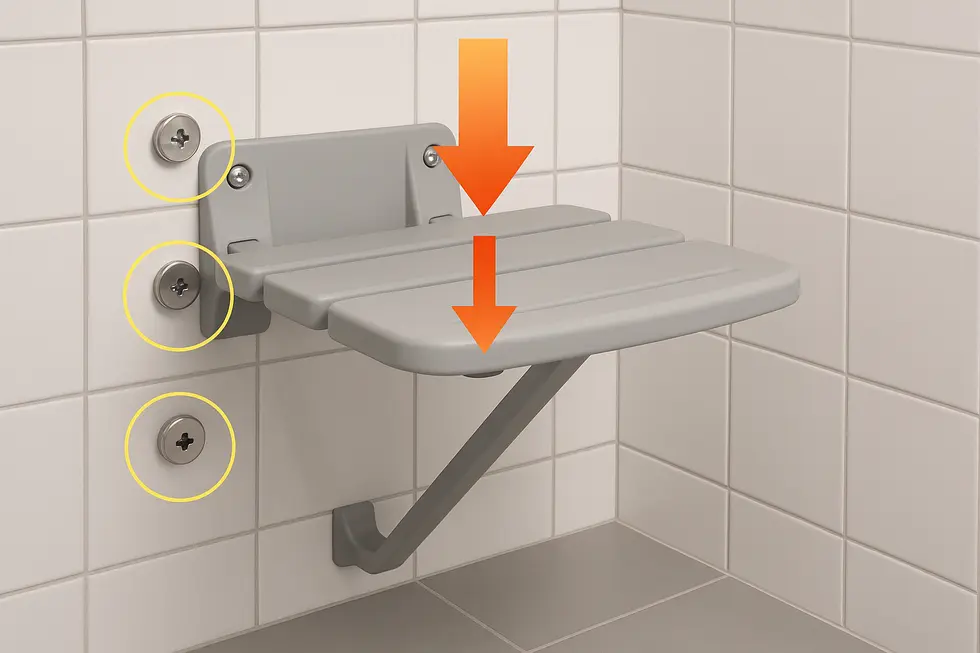
Stud engagement is non-negotiable. Glide a calibrated stud finder, confirm with a pilot hole, and plan for two studs—or continuous blocking—behind every bracket flange. If spacing is off, install 19-mm plywood or a steel plate before the wall finish. This backing spreads load, protecting brittle tile from point stress and allowing screw heads to clamp firmly without crushing ceramic.
With structure mapped, mark mounting height, accounting for folded clearance and accessibility guidelines. Tape tile to prevent chipping, drill through the glaze with a diamond bit, then switch to wood as soon as you feel lumber. Flush each hole with alcohol, inject a dab of neutral-cure silicone, and drive the lag screw slowly using a socket wrench so you sense resistance. Stop when the bracket no longer rocks—overtightening can shear a fastener or pulverize tile.
Now prove your work. Hang a weighted bag equal to 150 % of the seat’s published rating for at least one minute. No creaks, shifts, or tile cracks? Installation passes. For a photo-rich walkthrough covering these exact steps, see our step-by-step shower seat installation guide.
Detailed shear and pull-out values for common stainless lag sizes—handy when specifying hardware for commercial installations—are available in this concise fastener reference.
From Statutes to Studs: Choosing Screws that Meet Load Codes for Wall-Mounted Shower Seats
Mounting a shower seat is not only a carpentry task—it is a legal and safety obligation. Current accessibility rules such as the ADA in the United States and EN 12182 in Europe begin at 250 lb static loads, yet many inspectors expect proof that the seat can resist 300–400 lb when users drop their weight suddenly. The hidden heroes that deliver this strength are the fasteners. If the screws yield, every other component, no matter how high-tech, becomes irrelevant.
That is why stainless-steel lag screws or bolts remain the gold standard. Grade A4 (also called 316) resists the relentless assault of hot water, soap, and chloride cleaners far longer than plated or galvanized steel. Strength, however, comes from dimension as much as metal. An M6—or 1/4-in.—diameter is the absolute floor; seats rated above 350 lb frequently rely on 8 mm or 5/16-in. shafts. Length must allow at least 1-1/2 in. of bite into solid 2 × 4 framing after passing through tile, backer board, and the mounting bracket. Countersunk Torx or hex heads permit high torque without cam-out, ensuring the screw is driven flush without stripping.
Equally important is the substrate. Building codes expect two studs or continuous plywood backing. Even the strongest screw will lever out of drywall. For retrofits where studs are elusive, add a 2 × 6 blocking plate between studs before tiling; this spreads the load and keeps fastener spacing within manufacturer guidelines. During installation, apply a small bead of silicone under each screw head to seal the penetration and prevent water wicking along threads.
Because bathroom fixtures endure daily stress, recheck torque annually and replace any screw that shows corrosion bloom. Following these practices aligns your project with formal load tests and with common-sense duty of care. For a broader discussion of occupant protection, review our guide to the latest safety guidelines for wall-mounted shower seats.
Final thoughts
Choosing the right screws for your wall-mounted shower seat is pivotal not only for the longevity of the installation but also for the safety of its users. By focusing on the appropriate materials, employing effective installation techniques, and adhering to load capacity and compliance standards, you can ensure that your shower seat remains secure for years to come. With this knowledge, you are well-equipped to provide a safe and comfortable experience for everyone in your household.
Experience a new standard of clean with PEGABidet—designed for comfort, safety, and independence. Join thousands who trust us to make personal care simple and dignified. Contact us at contact@pegabidet.com.
About us
PEGABidet is a brand owned by L.A NEXTGEN LLC, based in California. We design intuitive, hygienic, and accessible bathroom solutions that prioritize safety, dignity, and independence. Our mission is to make personal care effortless and empowering for people at every stage of life.