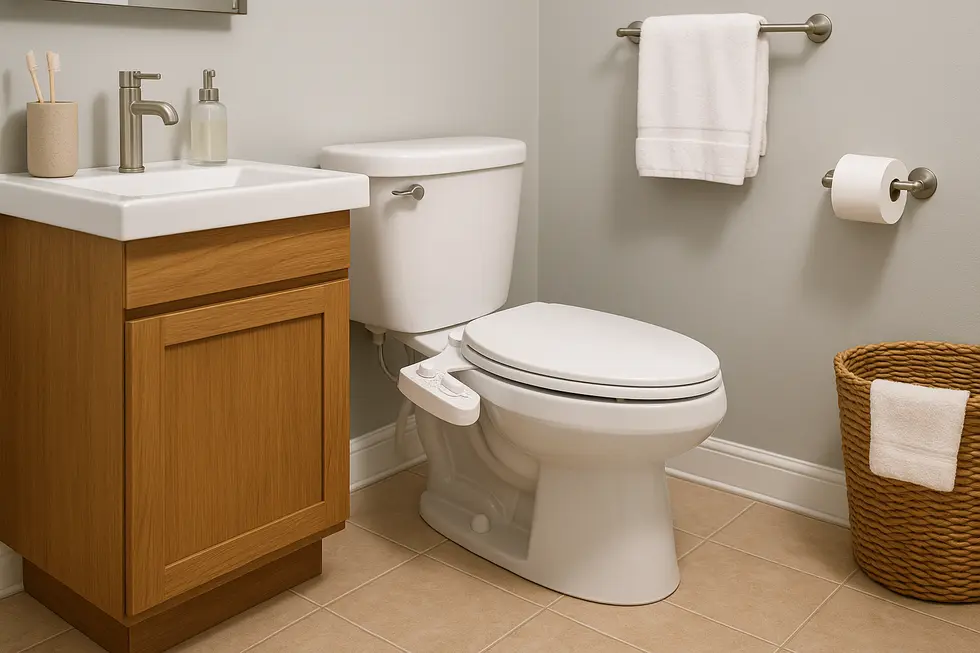
Bidet Attachment
Easy Steps to Installing a Bidet Attachment: A Family Guide
Jul
Installing a bidet attachment can elevate your bathroom experience, offering enhanced hygiene and comfort for the entire family. Whether you’re looking to reduce toilet paper use or simply accommodate different family needs, understanding how to install a bidet attachment can be empowering. This guide will equip you with essential knowledge, starting with the necessary plumbing preparations, followed by a detailed mechanical installation process, and concluding with practical post-installation testing and maintenance tips. Embrace this step-by-step journey to transform your bathroom into a space of modern luxury and sustainability.
Laying the Groundwork: Plumbing Checks That Make Bidet Attachment Installs Leak-Free
Before the wrench touches a bolt, smart installers pause to study the bathroom’s water path. Begin with the chrome shut-off beside the tank. Turn it clockwise until it stops. If it refuses, mist a drop of penetrating oil and wait; forcing a seized valve can shear the stem and create an instant geyser. With the valve closed, flush once and hold the lever until the tank empties. Any hiss afterward means the valve still passes water and must be replaced before you continue.
Slide a rag under the toilet and inspect the supply hose. Vinyl lines harden over time, becoming brittle the moment they’re bent to accept a T-valve. Squeeze along the hose; if it feels stiff or shows bubbles, swap it for a braided stainless-steel line. Measure the old one and purchase a hose at least 20 cm longer—extra slack prevents strain once the bidet tee is in place.
Next, stage the attachment on the rim without removing the seat yet. Check that its mounting plate clears the tank curve and that the nozzle retracts freely. Many one-piece toilets curve dramatically, so a quick dry-fit reveals whether the brackets need adjustment rather than discovering the clash mid-install.
Pressure matters as much as space. Thread a simple gauge onto the fill-valve stem. Domestic bathrooms should sit between 40–80 psi; higher pressure can overpower non-electric bidet regulators and spray like a firehose. If your reading tops 80 psi, add an inline reducer or call a plumber.
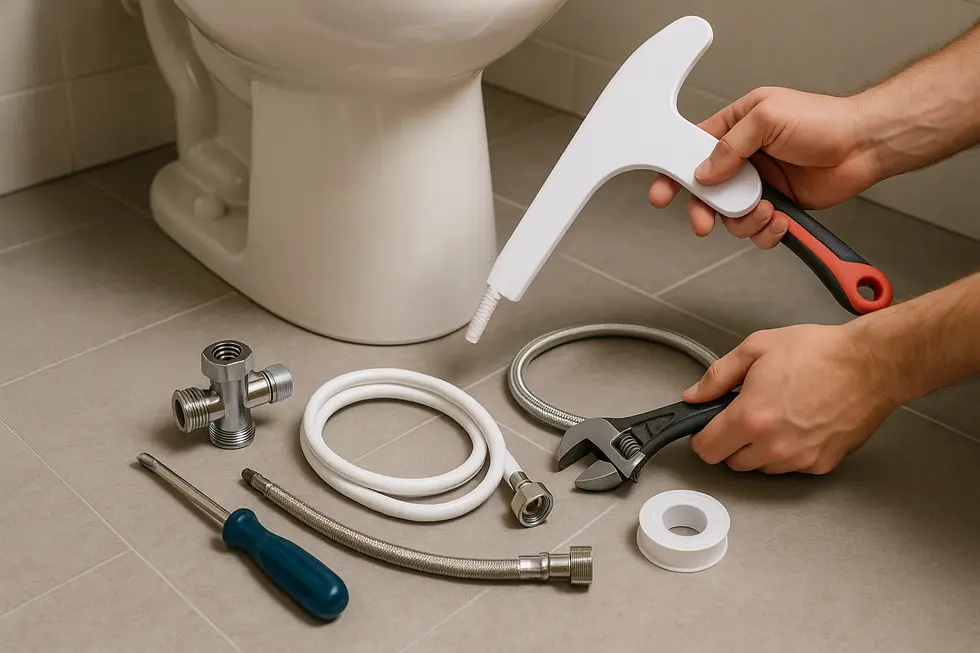
Gather tools before water starts to drip: channel-lock pliers with padded jaws, a flat screwdriver, plumber’s tape and an absorbent towel. Two tidy turns of tape on every male thread create a watertight seal without gorilla force. Rest the towel under the valve so residual water finds cotton instead of flooring.
Spending fifteen deliberate minutes on these checks transforms the upcoming steps into confident routine, letting you calmly add a bidet to an existing toilet rather than scrambling for mops. For illustrated instructions on shutting off and draining a tank, see Family Handyman’s practical guide.
Locking It All Together: A Hands-On Guide to Mechanically Integrating Your Bidet Attachment
Once the box is open and the tools are laid out, you are only a few precise moves away from a fully functioning bidet attachment. Start by closing the shut-off valve behind the toilet and giving the handle a flush; this empties most of the water so nothing drips on your floor. With the tank quiet, reach under the bowl and twist the seat bolts counter-clockwise. A flathead screwdriver on top and pliers underneath usually break them free in seconds.
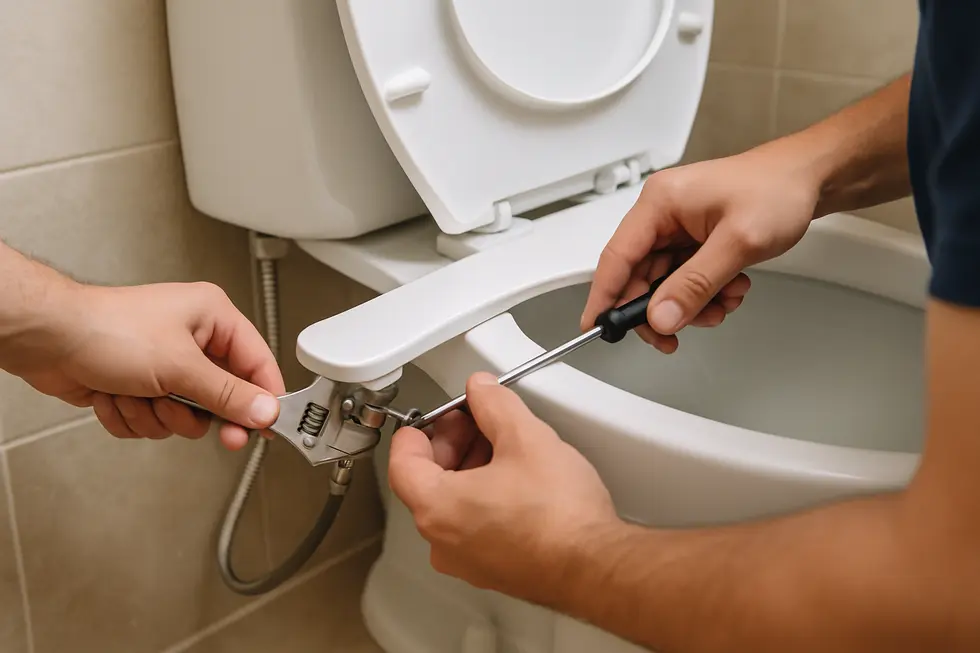
Now the rim is exposed, slide the slim plastic or stainless frame of the attachment over the bowl. Do not worry about perfect alignment yet—final adjustments come after water lines are tight. Before you touch those lines, disconnect the braided hose that feeds the tank. Hand-tight at first, then one quick turn with a small wrench. In its place threads the T-valve, the clever three-way fitting that shares water between tank and sprayer. Make certain the rubber washer inside the valve is seated; that washer is your leak insurance.
With the T-valve snug, reconnect the original hose to the top port and click the new bidet hose onto the side port. The opposite end of this hose screws straight to the attachment’s inlet. Finger-tight until resistance, then a gentle quarter-turn with pliers—overtightening can crush plastic threads. Only now return to the seat. Drop the bolts through the attachment’s slots and the bowl, wiggle the frame until the nozzle sits centered in the opening, then lock the nuts underneath. This small choreography ensures the spray reaches exactly where you expect.
Stand up, open the shut-off valve slowly, and watch every joint. A bead of water means another half-turn. Satisfied, sit, engage the control, and let the first test spray hit the bowl. Adjust pressure, angle, and you are done. The whole procedure is reversible, so renters and hesitant DIYers can relax—nothing permanent has changed, you have simply added a hygienic option to the existing fixture. For more tips on how to add a bidet to an existing toilet, visit this practical guide. For a visual walk-through of the same mechanical steps, see the concise video demo in the BidetsPerth installation guide.
From First Spray to Years of Comfort: Testing and Caring for Your Newly Installed Bidet Attachment
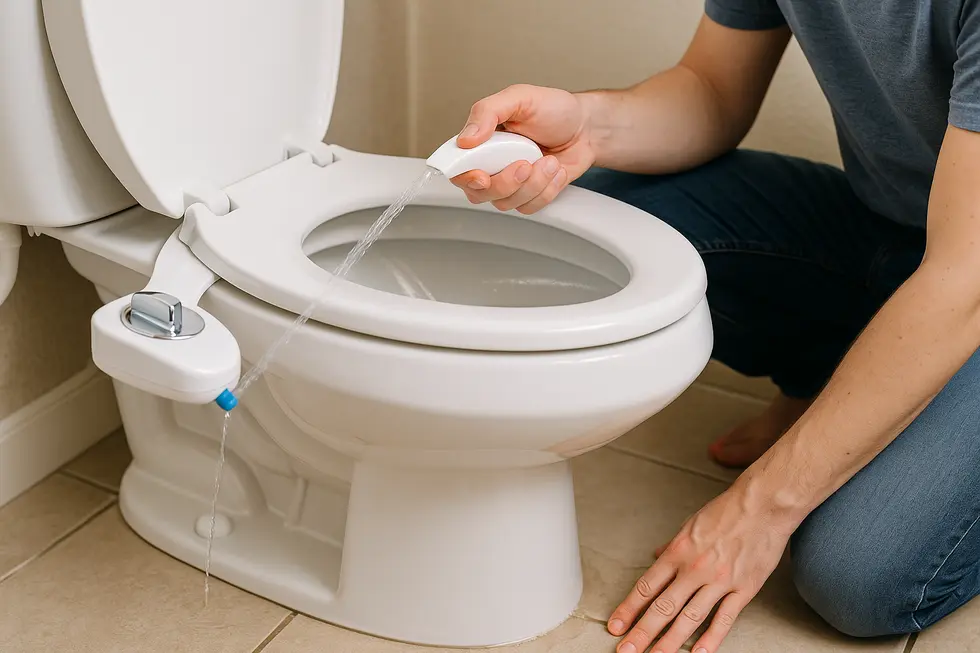
The final screw is tight, the seat feels solid, and it is tempting to declare victory. Instead, pause and run through a careful post-installation ritual that will protect both the bidet and your bathroom. Start by opening the shut-off valve only halfway. This slower fill allows trapped air to escape without forcing water past an imperfect seal. Lay a dry paper towel beneath every joint—the T-valve, the tank hose, and the bidet inlet—then watch for darkening spots during the next five minutes. Even a pin-sized bead signals a loose fitting; a quarter-turn with a wrench usually solves it.
With joints confirmed, sit sideways on the closed lid and rotate the pressure dial to the lowest setting. A soft hiss should replace any sputter; sputtering means air is still purging, so keep cycling the dial until the stream steadies. Now test real-world use. Center yourself, then increase pressure gradually. Verify that the spray arc reaches without overshooting the rim, and note the knob position that feels comfortable—marking it with a tiny piece of tape helps new users avoid surprises.
Routine upkeep is simpler than most faucet maintenance. Once a week, wipe the attachment’s body with a non-abrasive cloth dipped in mild soapy water; harsh chemicals can cloud plastic housings and erode gaskets. Many models hide a small mesh filter inside the hose connector—shut off the water, unscrew the hose, and rinse the screen monthly if your area has hard water. Mineral buildup on nozzles can be dissolved by soaking the tip in equal parts white vinegar and warm water for ten minutes.
Every three months, inspect supply hoses for bulges or cracks and confirm that the seat bolts remain snug. If you ever disconnect the attachment—for deep cleaning or a move—replace the inexpensive rubber washers before reattaching to guarantee a watertight seal.
For households using non-electric units, extra care can lengthen service life; see this detailed guide to non-electric bidet attachments for additional tips.
By adopting this brief testing and maintenance routine, you’ll ensure your new bidet delivers consistent, hygienic comfort for years without unexpected leaks or limescale surprises.
Final thoughts
Embarking on the journey of installing a bidet attachment not only modernizes your bathroom but also supports a more sustainable lifestyle. By following the outlined steps for plumbing preparation, mechanical integration, and thorough testing, you can enjoy the benefits of a cleaner and convenient bathroom routine. Empower your family with a touch of luxury that prioritizes comfort and eco-friendliness, leaving you confident in your DIY abilities.
Experience a new standard of clean with PEGABidet—designed for comfort, safety, and independence. Join thousands who trust us to make personal care simple and dignified. Contact us at contact@pegabidet.com
About us
PEGABidet is a brand owned by L.A NEXTGEN LLC, based in California. We design intuitive, hygienic, and accessible bathroom solutions that prioritize safety, dignity, and independence. Our mission is to make personal care effortless and empowering for people at every stage of life.